|
To enable Cashier Banking (v2), the screen needs to be added to the menu within Income Management. Go to System Setup > Security Setup > Menu Navigate to the Paye.net tab and add to the Selected section
|
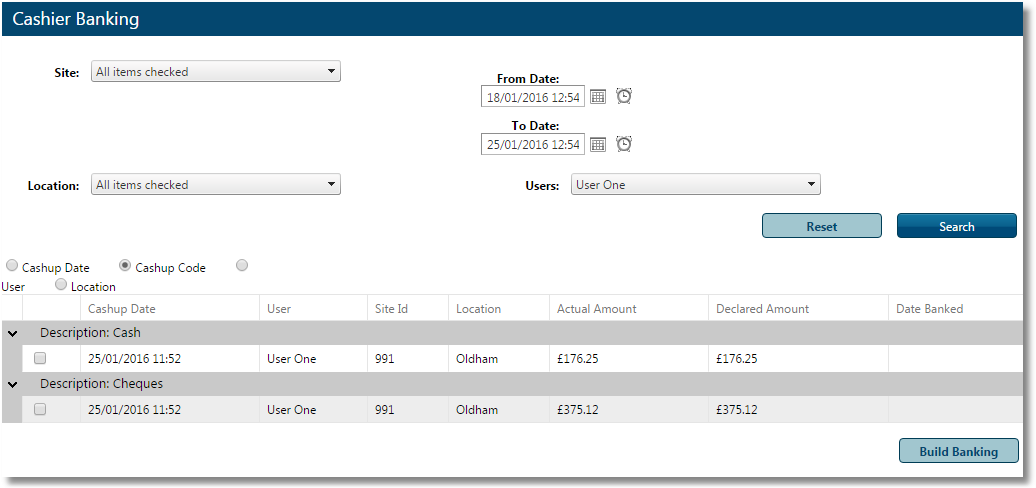
Cashier Banking can be done per location per site, which can be used for sites with many locations which uses a central hub to cash up.
For example, a council which has several kiosks but one central banking office. This helps to eliminate any banking and cashup errors.

If more than one site is available to the user, you will have an option to select from the drop down list.
From Date/ Time - To Date / Time : All cashier banking transactions performed during the times selected by the user within those locations will be displayed.
Select a location (or all locations) for which you want to perform banking.
All users from the selected location and site will become available on the drop down list.

Once all the items have been selected, the available banking transactions will be displayed.

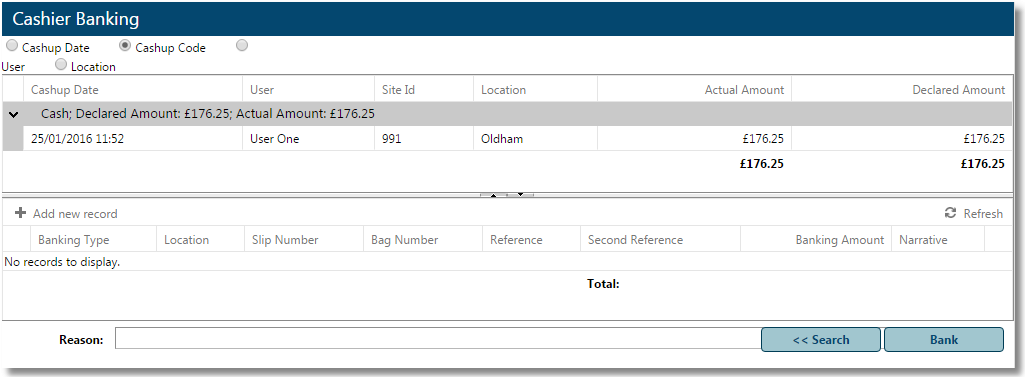
Select one of the transactions and click Build Banking - this will take you to the banking screen.

The details of the Cashier Declared information will be displayed.
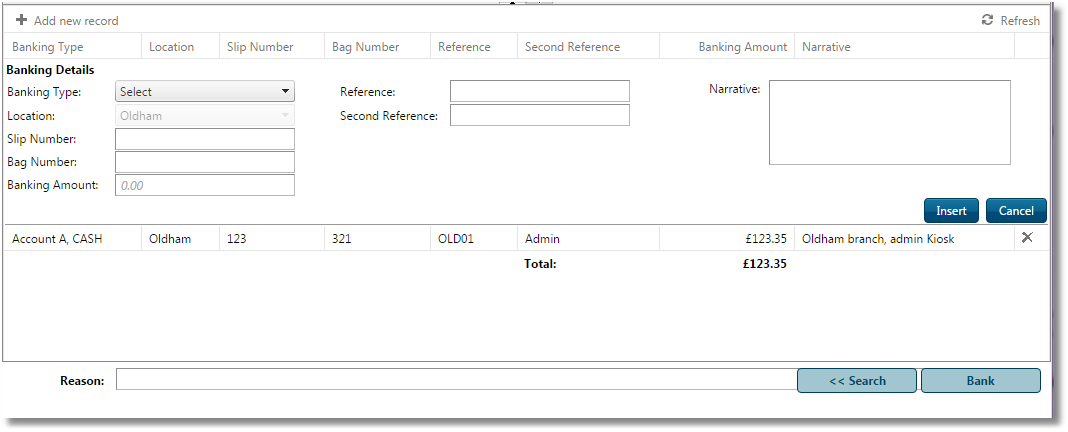
From there, you can add the banking information. - Click Add New Record


Complete all sections and once all records have been added, click Bank.
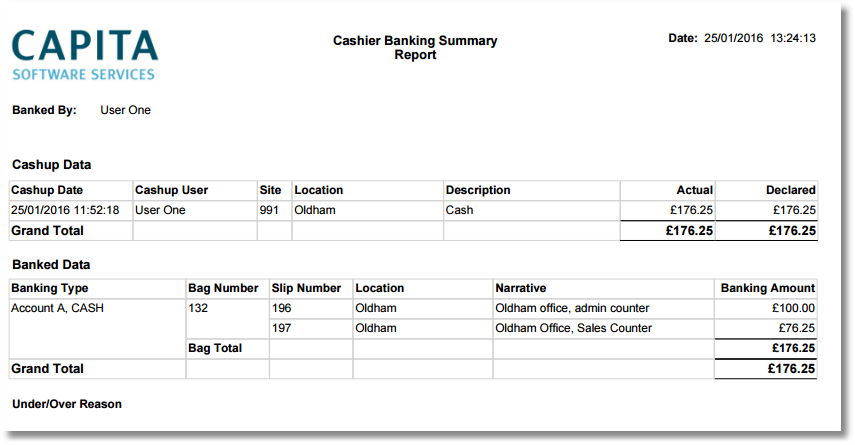
The report of the banking will be displayed.
